Overview
Ready to convert your anonymous website visitors into loyal customers? In 2026, the key to successful lead generation will be mastering the Pardot form. Whether you’re building directly in the platform or considering a Pardot form handler for your external website, the first step towards successful form tracking and better prospect data is getting the setup right.
In this ultimate guide, we will take you through the entire process of creating a Pardot form. We will cover the following 5 essential pillars of Pardot form creation.
- Initial Setup: Naming and tagging for organized campaigns.
- Field Customization: Managing data formats and using dependent logic.
- Aesthetics: Polishing the look and feel to match your brand.
- Automation: Setting up completion actions and “Thank You” redirects.
- Launch: Deploying via iFrame and monitoring your performance reports.
From adding reCAPTCHA to passing hidden values for better attribution, this blog gives you a clear roadmap to start capturing and converting prospects with ease.
Get simple yet informative insights on Pardot form
A form is a source of acquiring information from anonymous visitors on your website or landing pages and helps you turn them into known prospects or paying customers. Similarly, Pardot forms help you gather visitor information visits on any of the web pages of your website. With the right Pardot consulting expertise, these forms become powerful tools for capturing leads and automating marketing workflows. These Pardot forms are quite advanced and easy to handle.
But how to create a form in Pardot? Let us tell you!
All you need to do in Pardot, navigate to Marketing >> Forms >> Forms. A new page will open.

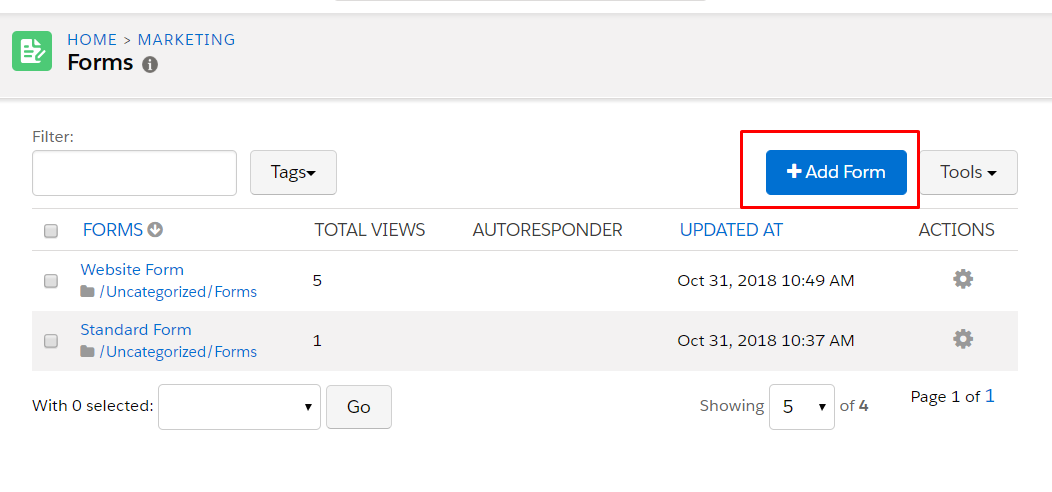
To create a form in Pardot, you need to go through these simple 5 steps:
- Name
- Fields
- Look & feel
- Completion actions
- Confirm & save
In every step, you need to fill in some information.
Let’s take a glance on these steps in detail
Step 1: Name
- Give a unique name to form. For example: ‘EN-IN/Webniar-19-RegistorNow’
- Add Tags to the form. For example: ‘Website’, ‘Webniar-19’
- Choose a folder. For example: ‘Website’
- Then, Choose campaign. For example: ‘Website contact us page’
- Click on Next

Step 2: Fields
- By default, you will get four fields (First name, Last name, Company, Email(a)) on your form
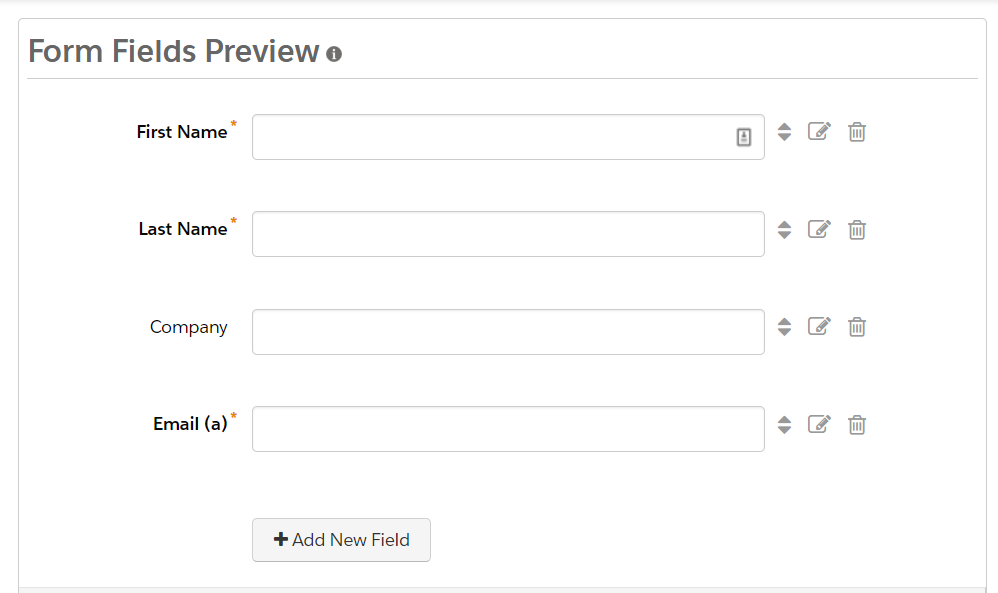
- If you want to add a new field on the form, click on ‘Add new field’. A pop up will open
- In the basic tab, you can choose a field and then edit its label, field type and data format

- Advanced tab gives you more control over fields. You can add a validation error message, CSS classes for design and detailed description of the field

- In the dependent tab, you can add different rules on the field to show other fields. For example: if ‘service’ field is marketing, then show ‘tool’ field

- Click on Next.
Step 3: Look and feel
- If you want to edit look and feel of a form, this can be the best step for you
- Choose a form layout template, which you have added in form layout template section
- You can edit the submit button text, by adding submit button text
- If you have to add text above and below the form, then you can add the required text in the editor of the above form and below the form tab
- In the basic tab, you can choose a field and then edit its label, field type and data format
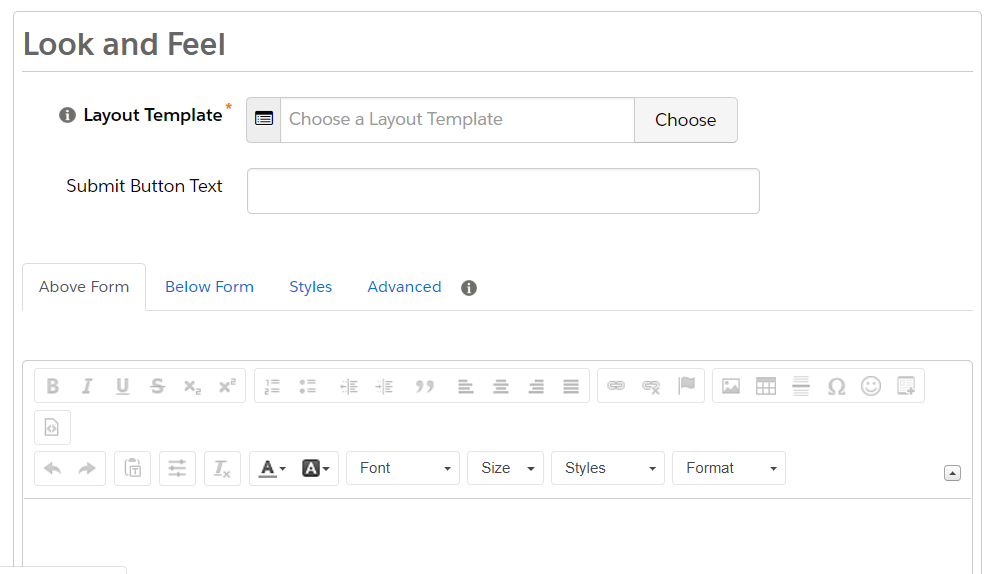
- Basic level style formatting can be handled in styles tab. For example, font colour, font Size and more

- From the advanced tab, you can add/remove reCAPTCHA on the form and enable/disable cookies

- Click on Next to save edits.
- Note: You can get as many templates needed from the layout template in Pardot. You will find this option in Marketing >> Forms >>Layout templates. You can direct add HTML + CSS in editor. Also, by default, you will get one standard template.

Step 4: Completion Actions
- Here you can add actions after form gets submitted

- Thank you Content:
- If you want to add thank you message for Pardot form, add your text in Thank you content editor
- After submission, you can redirect the form to the thank you page by following URL instead of showing the form’s Thank You Content’ option and add URL in redirection location.

- Not only this, but you can also send autoresponder email on form submit add prospect into the list, notify the user on form submit, assign prospect to user and much more through ‘Completion Actions’. You can add multiple Completion Actions on a single form.

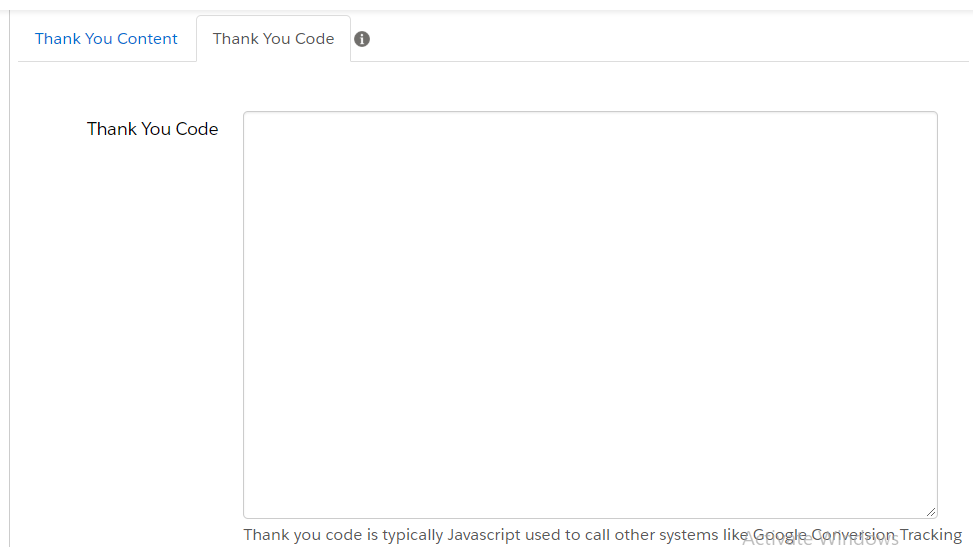
- Thank you code
- The code is typically written in JavaScript and is also used to call other systems like Google conversion tracking.
- Click on Next and save your settings.
Step 5: Confirm & Save
- Verify all details and click on save
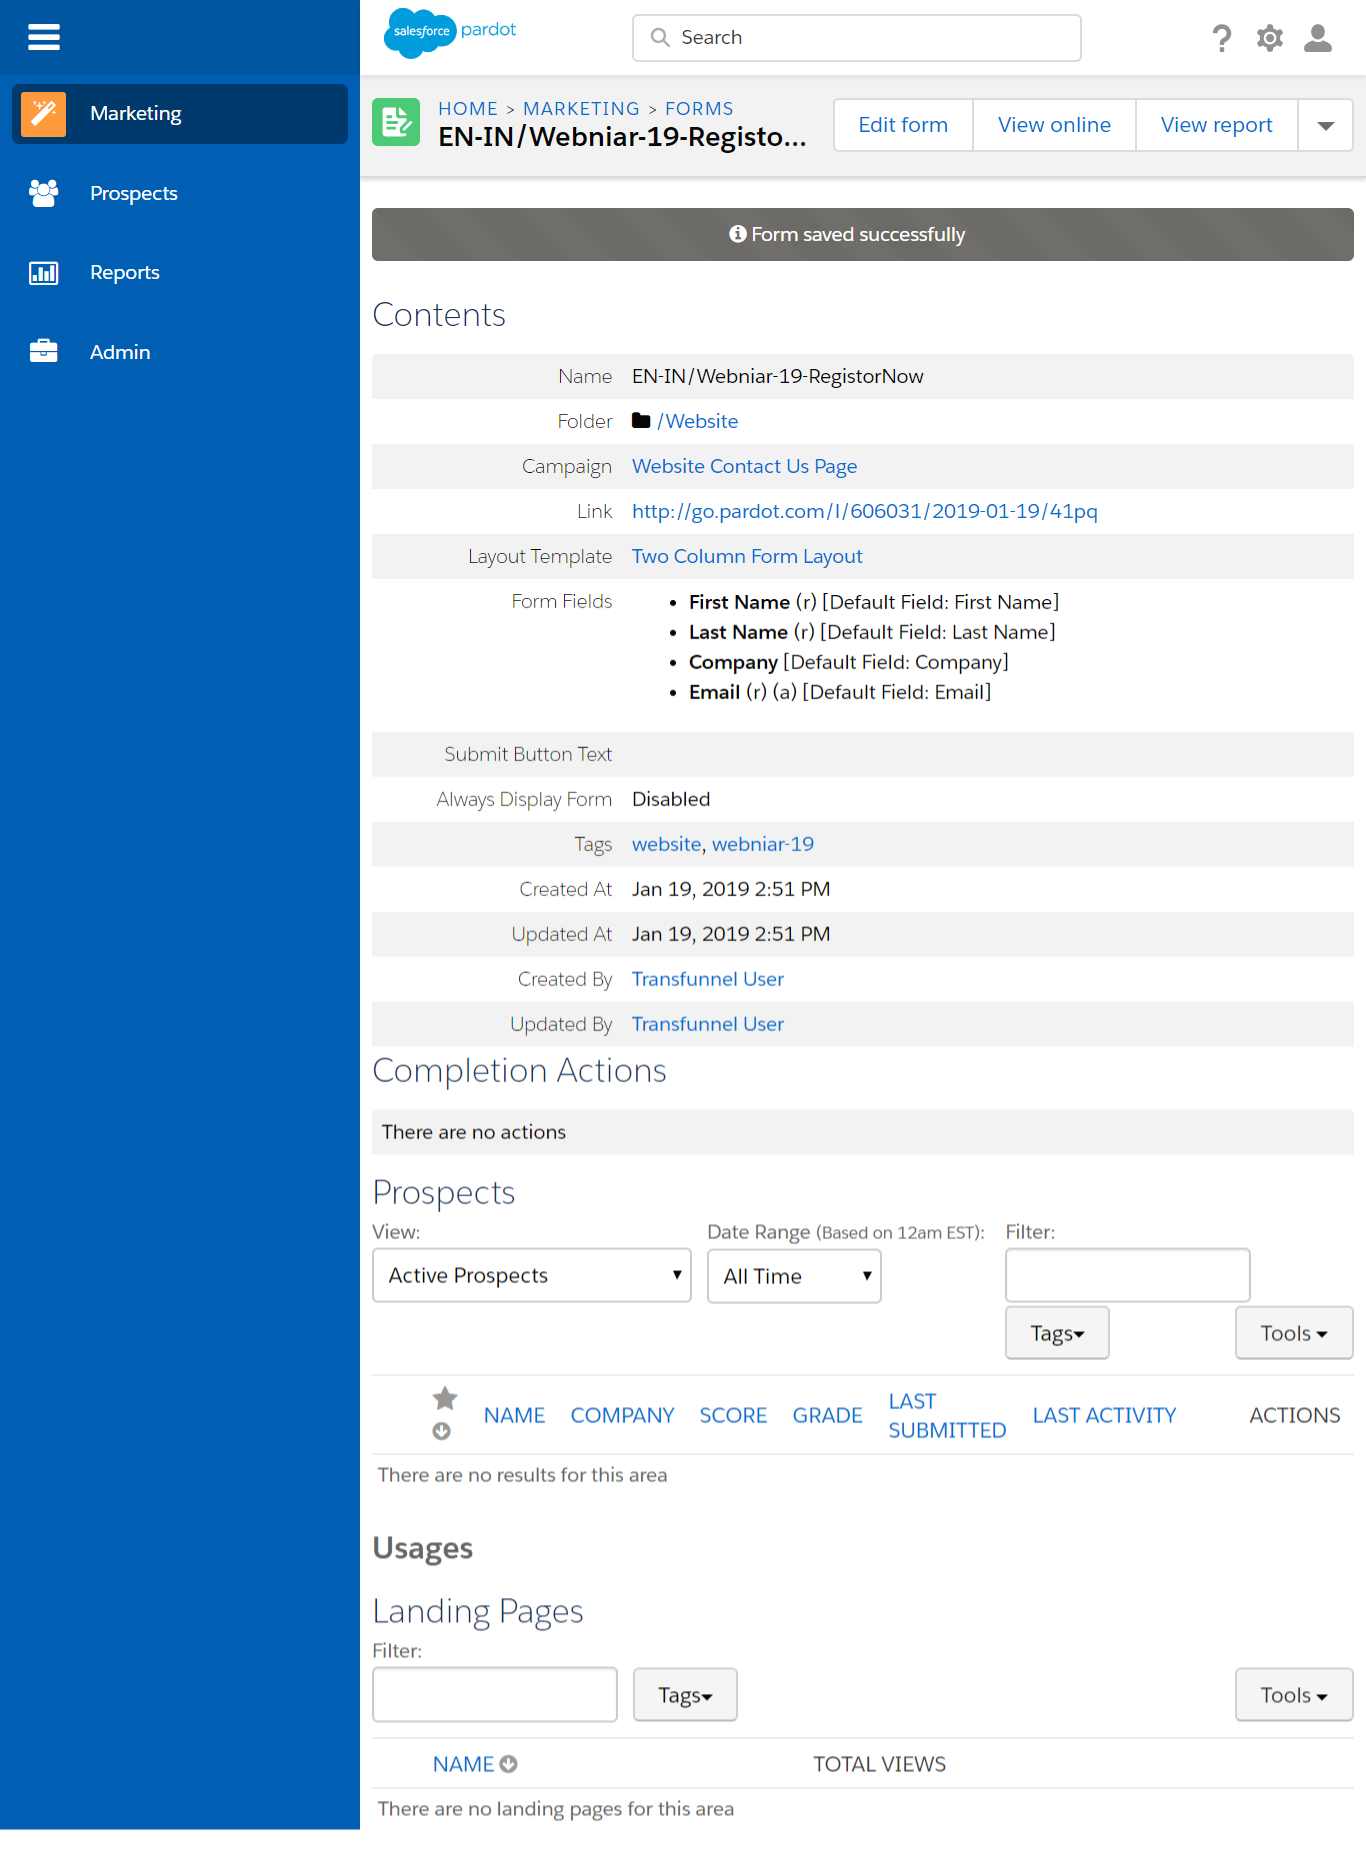
- On this screen, you are able to see the complete information about the form.
- At the top of the form, you will find the live preview link to see your form.
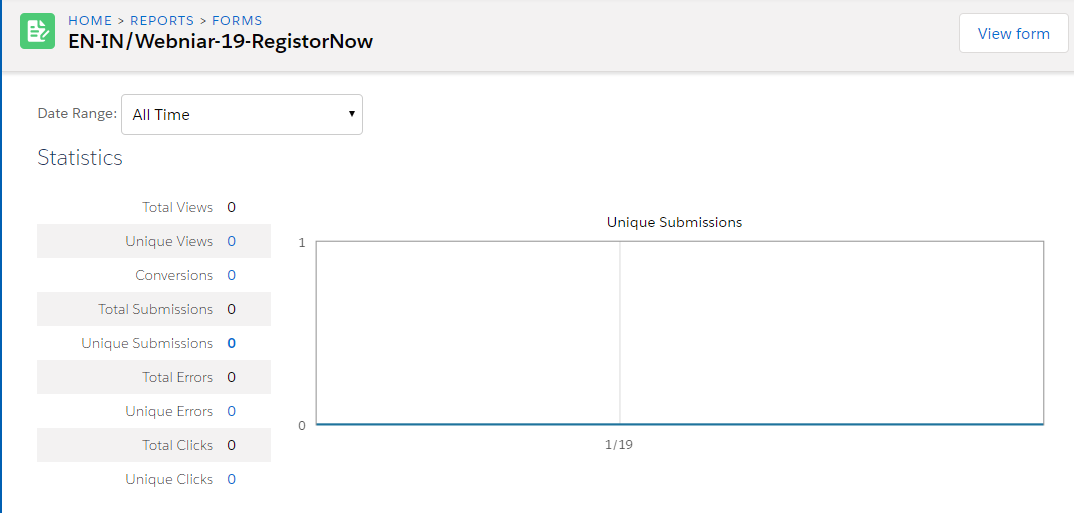
- The view report button is used to check the report of this form. In the report page, you can check the total views, total submissions, conversion and other statics in a graphical manner.
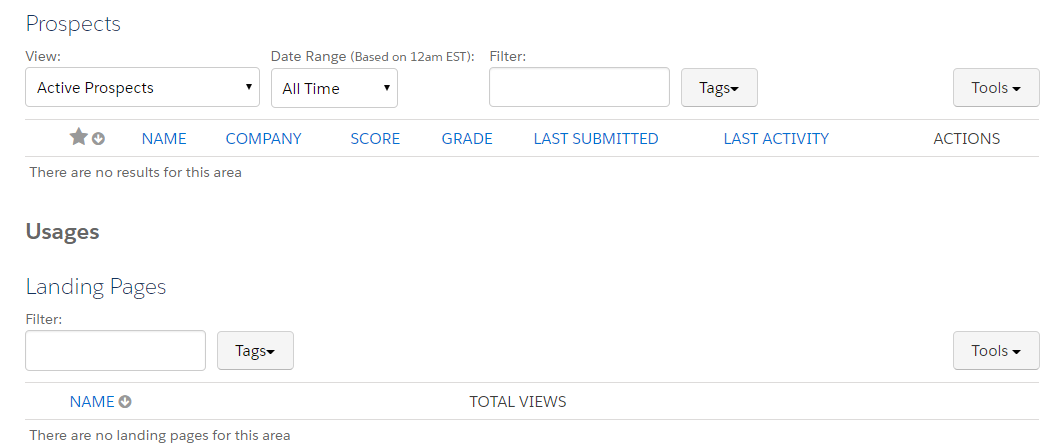
- You can see the list of prospects at the bottom of this Pardot form with the list of landing pages the Pardot form page is using.
- Your form is live and ready to use on site and landing page.
- Go ahead!!!
Please note:
If you want to add this Pardot form to your website (not on the Pardot landing page), write the iframe code and add this iframe to your website.
Here you can find this code after publishing on the website:
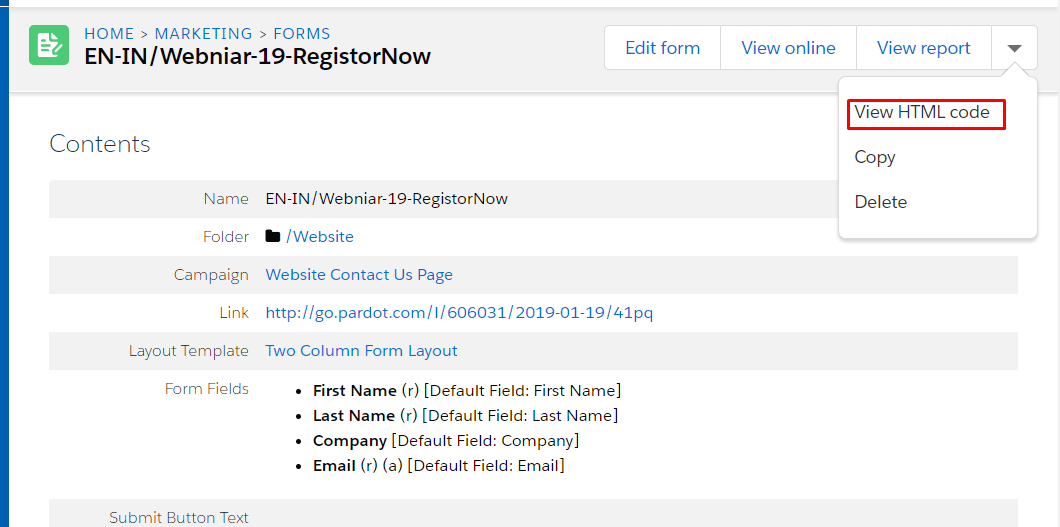
The iframe code will look like this:
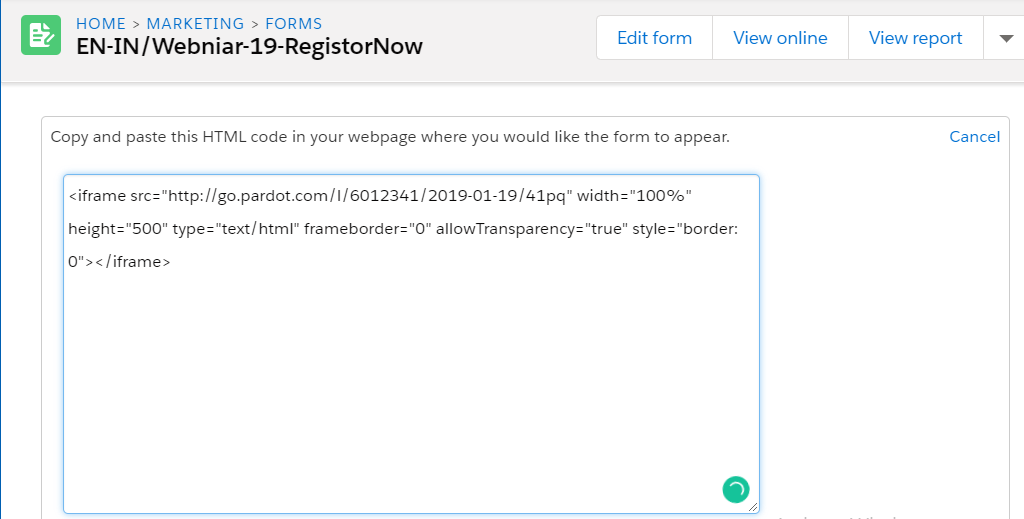
If you want to add default values to hidden fields of your form, then you need to add the field API/internal name and its value in the iframe src URL. For instance, here we are setting lead source and lead source details for prospects through hidden fields
In the above example, Lead_source is the internal name of field ‘Lead source’ and Website is the value, which we are setting for field lead source. It’s the same for the Lead source details field as well.
Ready to Optimize Your Pardot Forms for Better Lead Capture? Connect with Our Experts!
Frequently Asked Questions
-
What is a Pardot form?
A Pardot form is a pre-built lead capture form that is included with Salesforce Pardot and is used to capture lead information directly on landing pages or websites. It automatically tracks and stores prospect data and enables form tracking.
-
How do you create forms in Pardot?
To create a Pardot form, click Forms, select Add Form, then choose your fields, completion actions and finally publish your form to a landing page or site and watch Pardot form tracking go into action.
-
What is the difference between Pardot forms and form handlers?
A Pardot form is a fully functional form that you create and host in Pardot. A Pardot form handler connects forms on your website to Pardot so you don’t have to give up existing forms. Plus, form handlers capture leads and trigger actions based on what prospects do in the form fields.
-
Can I integrate Pardot form handlers with other CRM or marketing tools?
Yes, it is absolutely possible to have a pardot form handler reach outside of pardot and integrate with external systems, crm systems, marketing tools, and more. Using website forms, you can collect leads from 3rd party forms, and still have pardot data synced and form tracking.
-
How do I create and customize Pardot forms for marketing campaigns?
You can customize a Pardot form by selecting fields, adjusting layout templates, adding progressive profiling, and setting completion actions like email triggers or lead assignment. These features help personalize campaigns while improving Pardot form tracking and lead segmentation.
-
Why is Pardot form tracking important for marketers?
Pardot form tracking helps marketers understand how prospects interact with forms, which campaigns generate leads, and how visitors move through the funnel. This insight enables better targeting, campaign optimization, and improved lead conversion.